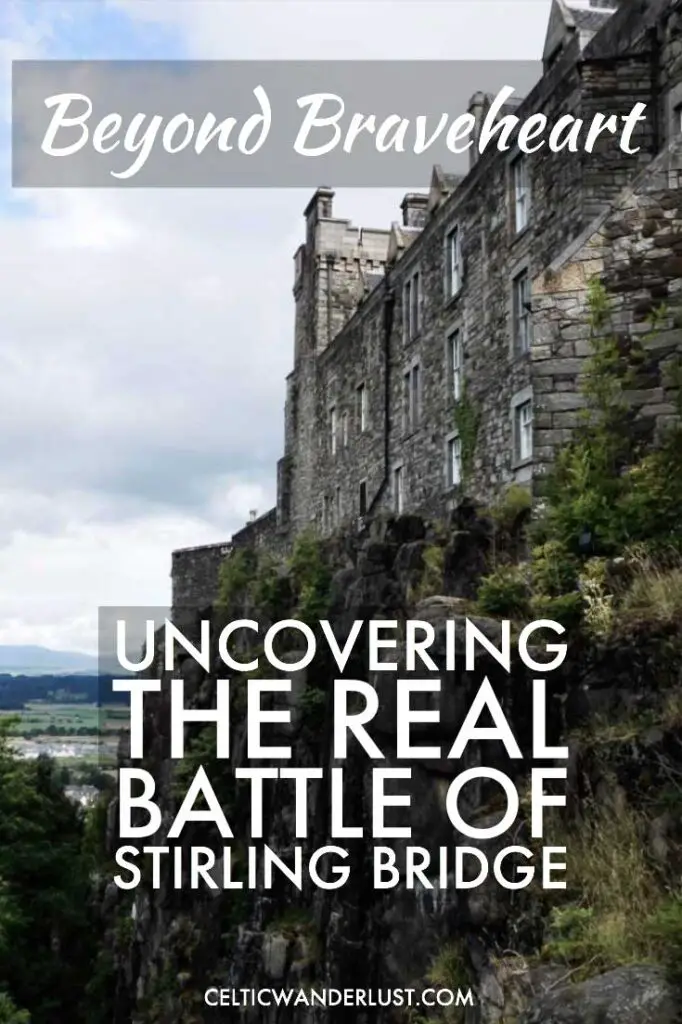
Beyond Braveheart, Uncovering the Real Battle of Stirling Bridge
The Battle of Stirling Bridge has been under the international spotlight since its epic reenactment in the 1995 movie Braveheart. Mel Gibson thankfully never claimed his movie was an accurate depiction of the life of William Wallace and we all know by now that Braveheart is FULL of inaccuracies.
So seductively inaccurate is this movie depiction that we don’t even know the real facts from the fiction anymore. So to get past the Hollywood version of the famous 1297 Battle of Stirling Bridge I took it upon myself to visit the place where it all happened and get the real story.
The sword fit for an archangel to wield,
– Thomas Campbell, Poet
Was light in his terrible hand.
Why Did the Battle of Stirling Bridge Happen?
As I journeyed to the medieval town of Stirling in central Scotland, a mere 30 minute train ride from Glasgow Queen Street Station, I once more went through the events which led to the epic Battle of Stirling Bridge. Travel notebook open on my lap and post-its gathered on the empty seat next to mine, I put the line of events back together again. Follow me…
With the death in 1290 of 6 year old Princess Margaret of Norway, heir to the Scottish crown, the clear line of succession was broken. Two strong contenders for the throne emerged: Robert Bruce and John Balliol, both ready to assert their claim on the battlefield. The kingdom of Scotland was on the verge of implosion.
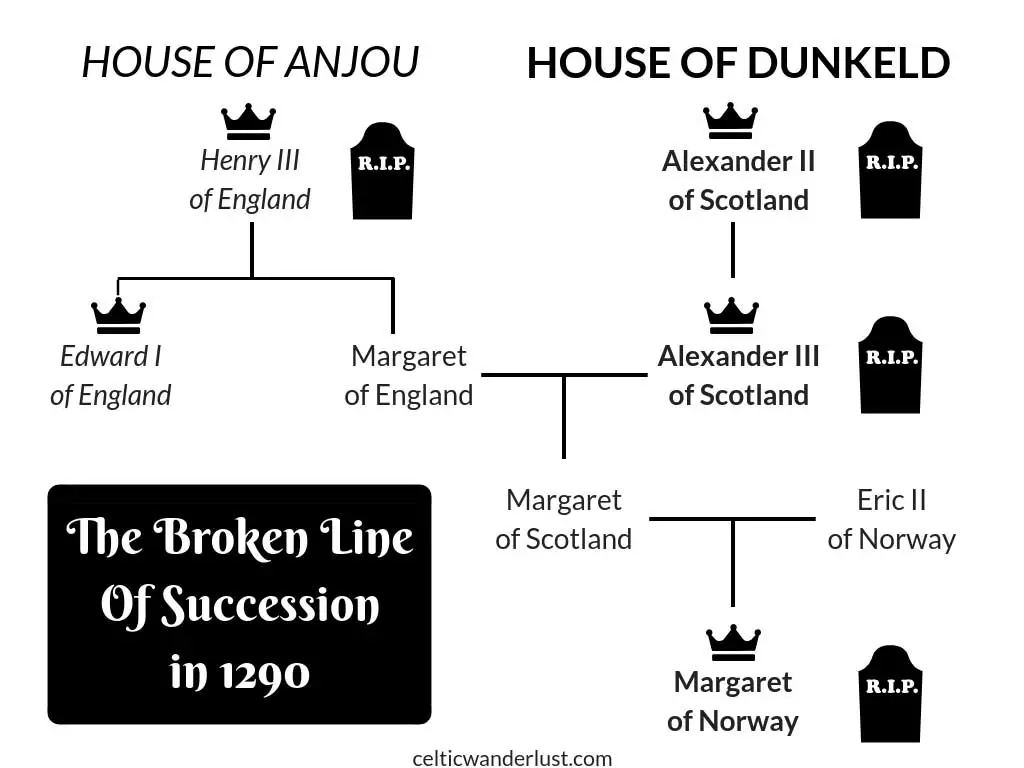
To avoid a civil war and settle the matter, the Guardians of Scotland asked the arbitration of Edward I, King of England and great-uncle of the late Princess Margaret. John Balliol was chosen as rightful heir of the Scottish throne but had to accept Edward as his overlord. John Balliol was to be a puppet king; Scotland was now in the hands of England… until King John rebelled.
Edward’s demand that John provided Scottish troops and funded his invasion of France in 1294 was the last straw. As Edward sent his army to France, John crossed the Border and attacked the English army. A swift and brutal response by Edward ensued. The First War of Scottish Independence had started.

Public Domain, Link
William Wallace (engraving of the late 17th or 18th century)
The rebellion quickly collapsed and John surrendered. He was sent to the Tower of London. In the summer of 1296, Edward toured the land making sure that every landowner accepted him as liege lord. But the Resistance wasn’t over yet. For reasons not entirely clear, William Wallace, a knight from Elderslie, killed the English sheriff of Lanark, along with every Englishman he and his men could get their hands on.
William Wallace joined forces with another rebel, Andrew de Moray, a nobleman’s son. A rebel army was now at large in Southern Scotland carrying raids on the English forces. To deal with the Scottish rebellion, troops were sent to reinforce the garrison in Stirling Castle. The Scots were waiting for them.
You might also be interested in:
– A Weekend Trip to Glasgow | A Culture Filled City Break for First-Timers
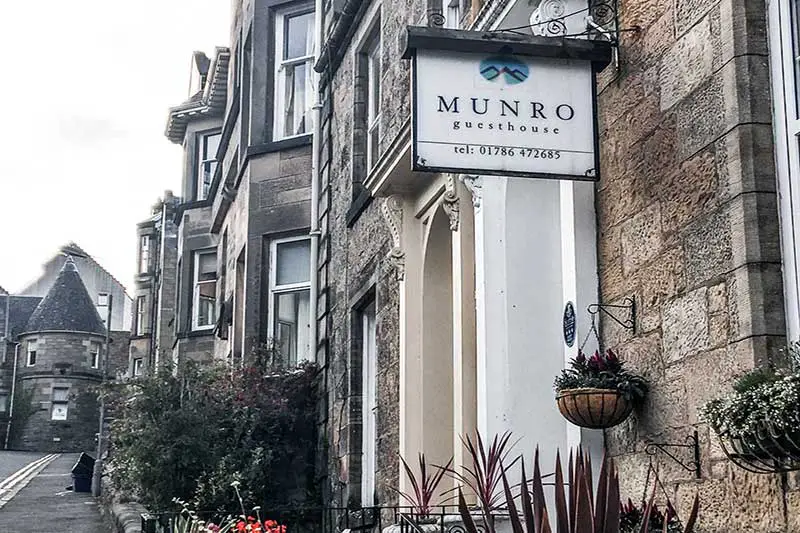
– Where to Stay in Stirling, Scotland | Munro Guest House
– How to Spend 48 Hours in Belfast – An Itinerary
Stirling Castle | Stronghold of the Powerful English Army
Back in the safety of the 21st century, I was now in Stirling myself, stepping outside the train station painted in traditional blue and white. To understand how the Battle of Stirling Bridge unfolded in 1297 I endeavoured to get a full picture of the opposing forces. First stop: the English army.
Prior to 1297, Stirling Castle was a royal residence of the Scottish Kings and Queens. However, by that fateful year it was under English control. To crush the rebellion led by William Wallace and Andrew de Moray additional troops were sent from England to this vital stronghold.
The first week of September 1297, the English commander John de Warenne entered Stirling Castle with an army of heavily armoured soldiers, the most powerful in Europe. Numbers vary: 1,000 to 3,000 cavalry and 9,000 to 15,000 infantry.
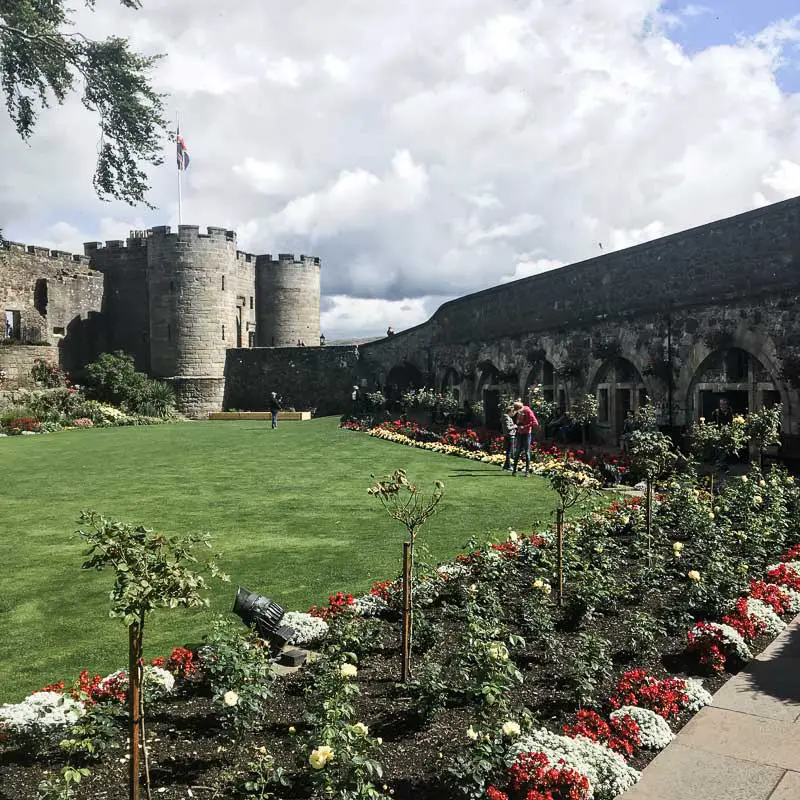
Stirling Castle was built on a rock called Castle Hill. I soon realised that the way to the top was going to be steep, much steeper that I thought it would be, and how unfit I had become (note to myself: sign up to a gym, fast).
Twenty minutes of cardio later I reached the Castle Esplanade, sweating the life out of me. It was mid morning and already the visitors were forming a queue to visit this popular attraction. I took a moment to compose myself, embarrassingly out of breath before passing through the formidable front gate, wide-eyed.
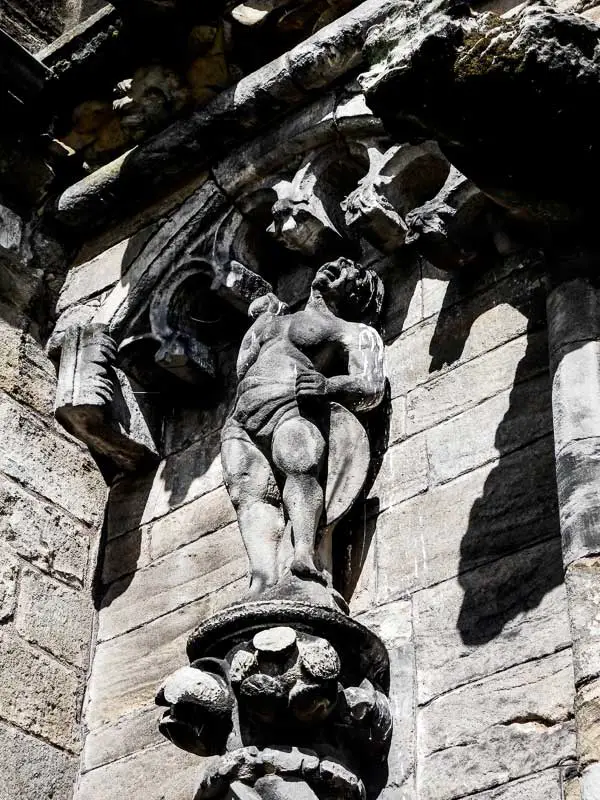
Stirling Castle looked certainly very different in 1297 from what stood in front of me. Neither the sumptuously sculpted Renaissance Palace nor the dizzyingly high-ceilinged Great Hall were there at the time of William Wallace. They were constructed much later, between the 15th and 17th centuries. Back then Stirling Castle was more of a damp and cold fortress than a stylish residence.
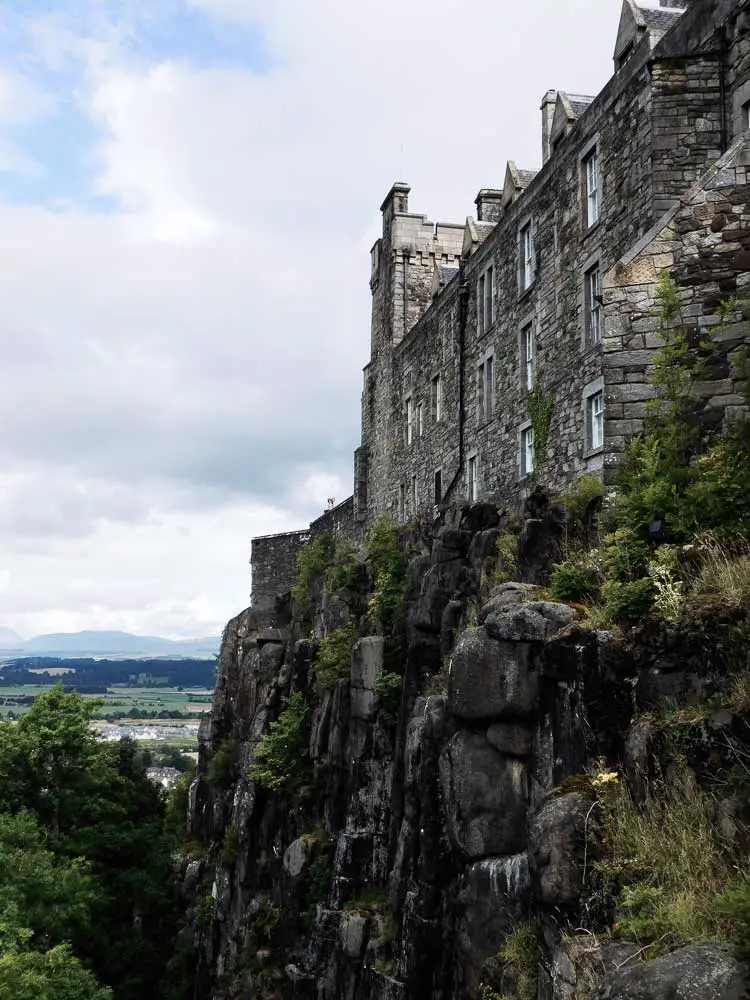
As I wandered along the remparts and battlements the defensive and strategic location of the castle was made obvious to me. The castle was surrounded on three sides by steep cliffs providing unobstructed views over the surrounding countryside. The Ladies’ Lookout at the top of the west cliff offered an impressive (and windy!) view from vertiginous heights.
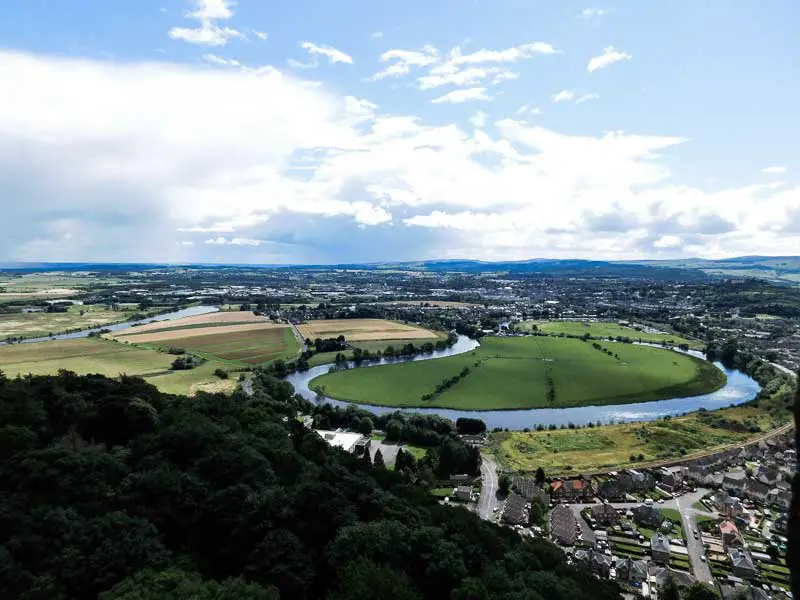
Towering over the Forth Valley, the 1297 fortress was controlling the farthest downstream crossing on the River Forth. From the eastern wall the river could be seen meandering like a snake amid the green fields, a river with a rapid flow that the English cavalry and infantry would have had to cross somehow. The successive U-bends of the river made the ground unsuitable for a deployment of the English forces. A negligible detail it might have seemed for this great army.
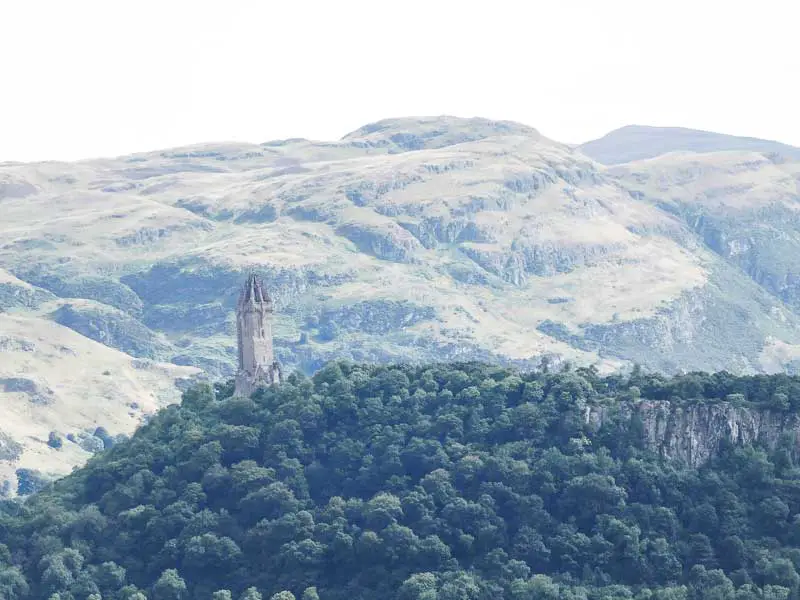
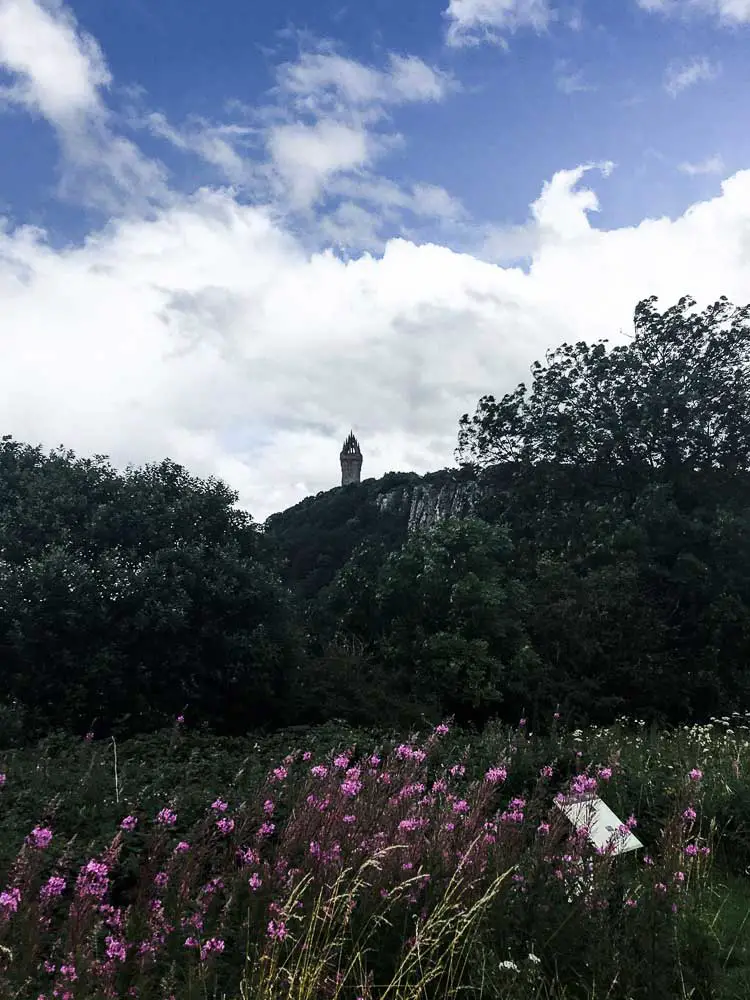
Clearly visible in the distance was the enemy HQ, the Abbey Craig, a rocky hill about 2 miles from the castle north of the river, now crowned with the National Wallace Monument. From their formidable vantage point, the English army had a strategic advantage over the Scots, in numbers and equipment too.
The Abbey Craig | Rocky Hideout for the Scottish Underdog
The rebellious Scots were controlling the lands north of the River Forth. William Wallace and his men had taken position on the Abbey Craig observing the enemy’s movements and waiting for the mighty English army to arrive in Stirling.
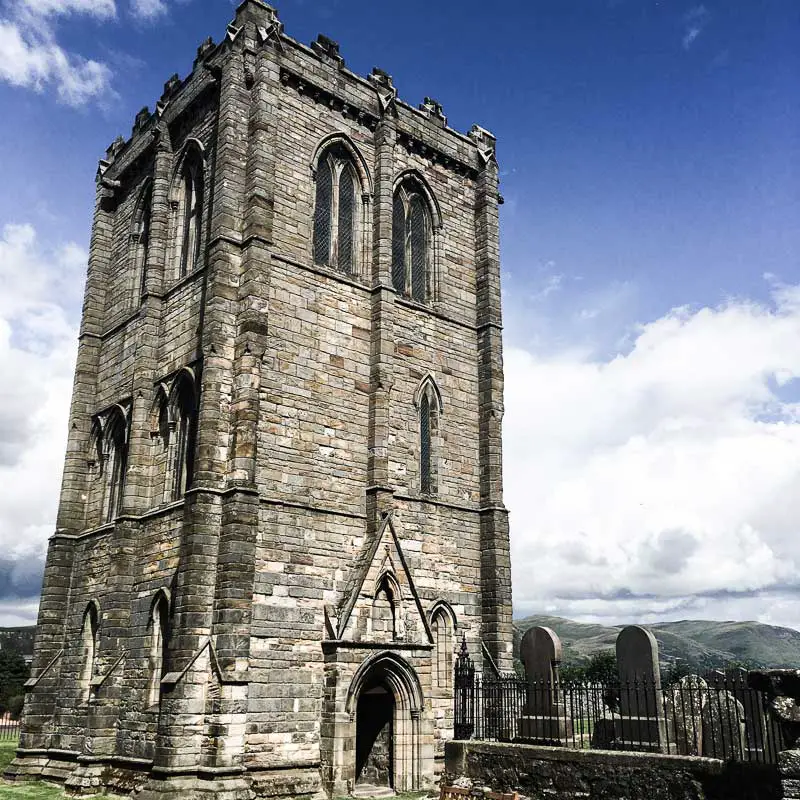
The Abbey Craig took its name from the Cambuskenneth Abbey nearby. I took a detour to visit the ruins of the once wealthy royal abbey. They were lying west of Stirling by the river on the edge of Cambuskenneth village, a 30 minute walk from the castle. The only remaining building was a square-shaped 13th century bell tower watching over the forgotten tomb of James III, King of Scots.
I resumed my journey heading north along the river towards the Abbey Craig for another 30 minutes. I passed through a modern village at the bottom of the Abbey Craig which today bears the name Causewayhead and started to climb the meandering path to the top of the Abbey Craig.
The lightly armed Scottish soldiers (300 cavalry, between 3,000 and 10,000 infantry – the numbers are not certain) had taken position under these trees on the flank of the hill. They were watching for the signal to attack, adrenaline pumping. But forget the blue-painted faces. This was a practice of a tribal people who lived centuries ago, the Picts. And the kilt? Not before the 16th century! Sorry, Mel.
From the top of the Abbey Craig, William Wallace and Andrew de Moray were watching over the river, waiting for the English to make their move in a game of draw. The Scots were clearly underpowered and outnumbered.
How the Epic Battle of Stirling Bridge Unfolded
Confident, the English commander John de Warenne thought the Scots would renounce once confronted with the power of his army. Negotiations hit a Scottish wall. William Wallace was not backing down.
We come here with no peaceful intent, but ready for battle, determined to avenge our wrongs and set our country free. Let your masters come and attack us: we are ready to meet them beard to beard.
– William Wallace (supposedly said)
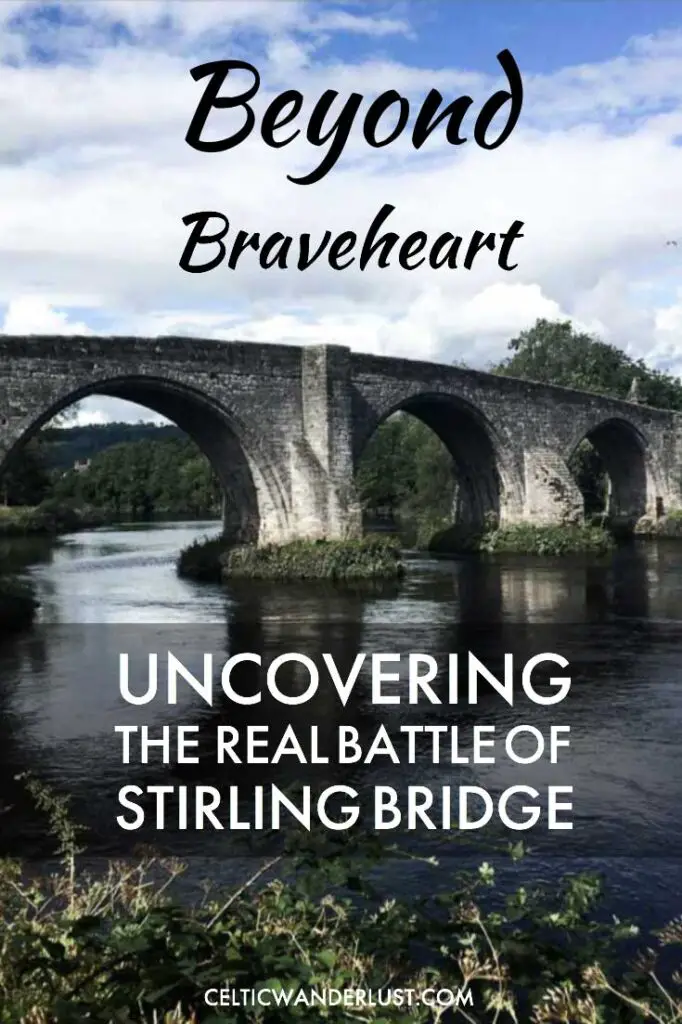
At dawn on the 11th September 1297, order was given to the English forces to advance and cross the River Forth. The safest place to cross the river was a local ford upstream but to avoid any costly delay decision was made to use a wooden bridge located midway between Stirling Castle and the Abbey Craig. This bridge that would give its name to the battle: Stirling Bridge.
Walking for 20 minutes along the busy Causewayhead Road lined with countless B&Bs, I soon reached Stirling Old Bridge. Built of stone in the 15th or 16th century, it replaced a succession of earlier timber bridges. The wooden Stirling Bridge which spanned the River Forth in 1297 didn’t survive the battle. It was located nearby.
Like Stirling Old Bridge today, the bridge in 1297 stood on the bent of one of the great loops in the river observed earlier from the castle. The loop almost formed an island connected to the north side of the river by a narrow stretch of land. In 1297 the banks of the river would have been muddy and boggy, the soft ground unsuitable for a heavy cavalry.
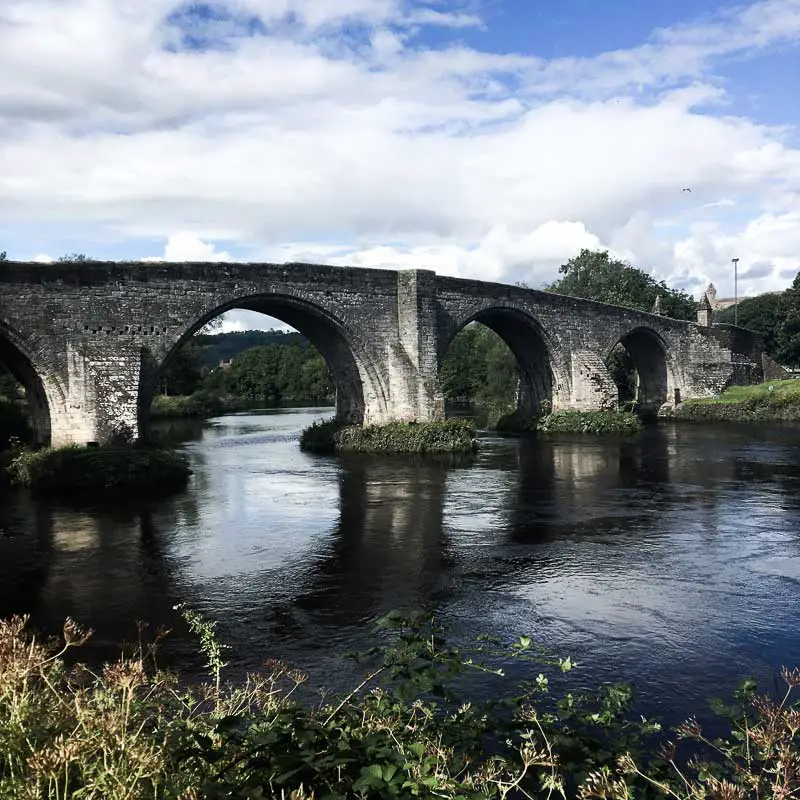
As I stood on what remains today one of the best medieval masonry arch bridges in Scotland, I could almost see the formidable English army in tight order marching down Castle Hill. I pictured the cavalry and archers crossing the river and trying to re-deploy their forces on the narrow, soft piece of land on the other side of the bridge.
Progress was slow. The narrow wooden bridge didn’t allow more than two horsemen to cross abreast. The monotonous river beneath the sturdy stone bridge provided me with a false sense of security. The river was flowing fast. The crossing of the wooden bridge must have been daunting for the English cavalry. If it collapsed the soldiers would drowned under their heavy armour.
Watching from the Abbey Craig, William Wallace was getting ready. What happened then couldn’t have been more unlike Mel Gibson’s fiction. The Scots and the English didn’t line up in an open field for combat. Neither did the Scots decimate the English forces with only their swords and an untold love for their native land.
Braveheart’s version of the battle of Stirling Bridge never happened.
Tactic was the true weapon of choice. Once a significant number of English forces had crossed, the Scots came down from high ground and attacked the English soldiers in a surprise scissor manoeuvre with both sides reaching the bridge at the same time.
The English army was trapped in the loop of the river, cut off from any reinforcement. The English cavalry were left powerless, unable to lead a charge due to the lack of space. It was a slaughter.
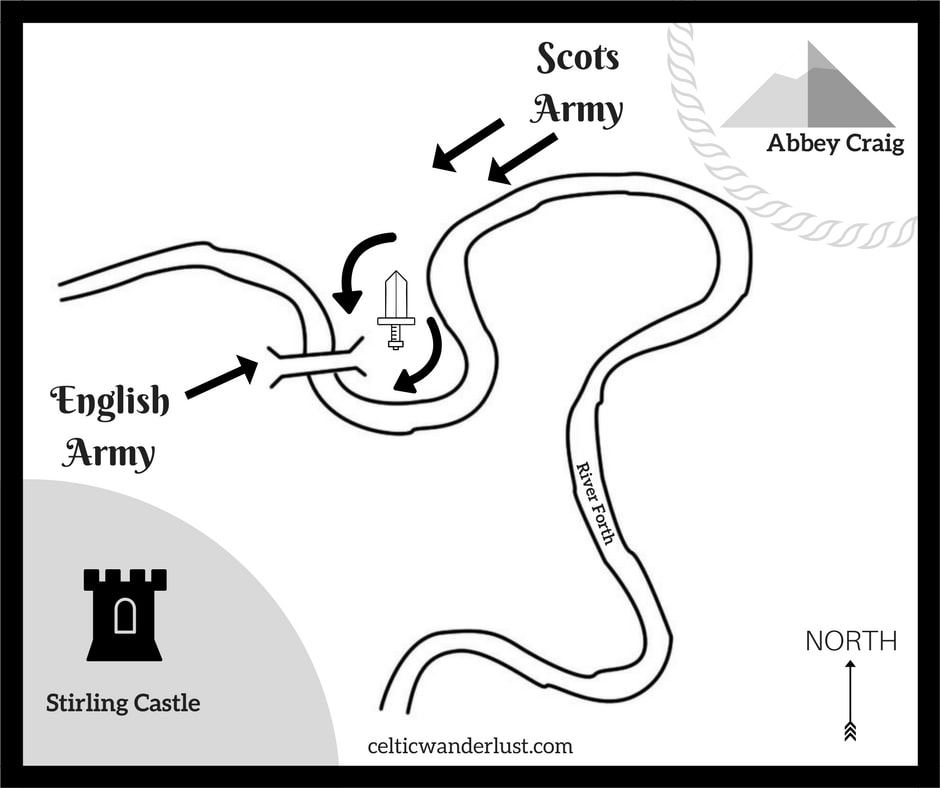
On the other side of the Stirling Bridge, watching a third of his army being killed, Warenne ordered its destruction, leaving the survivors on the far bank to their fate. Facing the prospect of being outnumbered the English army retreated to Berwick-upon-Tweed. The Scots had won an unexpected victory over the powerful, heavily armed English forces.
The National Wallace Monument | Celebration of the 1st National Hero
In the aftermath of the Scottish victory over the mighty English army, William Wallace was made Guardian of Scotland. His victory was more a symbolic than a political achievement as his glory was short-lived. Edward I sent a new army to the North a year later and crushed the Scots at the Battle of Falkirk in the summer of 1298. After several years on the run William Wallace was captured, sent to London and executed in 1305.
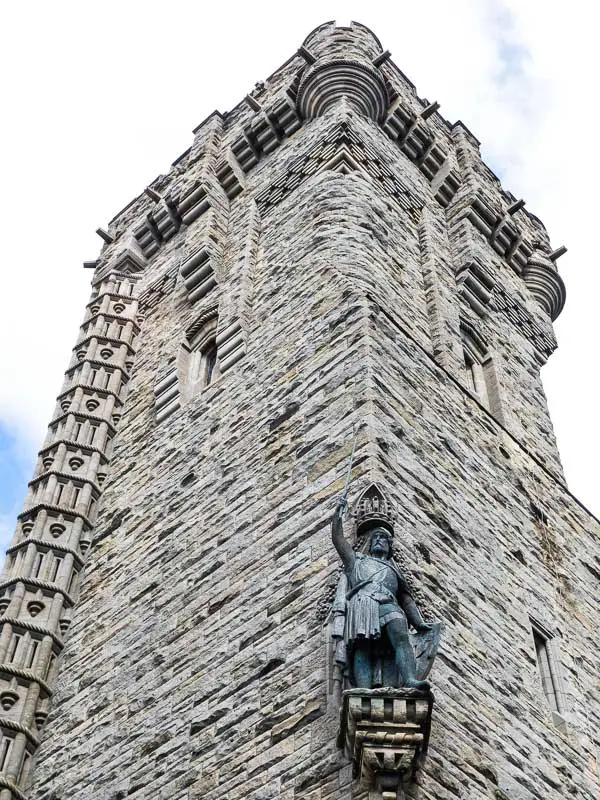
With a resurgence in Scottish identity during the 19th century William Wallace was turned into Scotland’s first national hero, the symbol of Scotland’s struggle for freedom. The National Wallace Monument, a 67-meter high sandstone tower in romantic Victorian Gothic style, was built to commemorate his life. It was completed in 1869 on the Abbey Craig.
The monument was conspicuous as I visited Stirling. It stood proud and tall on its rocky hill against a mountainous backdrop. The grand statue of Wallace with his sword aloft at its corner conveyed this odd feeling that the hero was still keeping a watchful eye over the valley, long after the battle had ended.
Walking to the top of the Abbey Craig and climbing the narrow spiral staircase inside the monument felt like a pilgrimage. The tower, composed of three high-ceilinged rooms, each located on a different floor, reminded me of a mausoleum but without the gloom. Still, the visitors were only whispering.
The life of William Wallace and his victory at the Battle of Stirling Bridge were recounted in the Hall of Arms on the first floor while his 1.63-meter long sword was exhibited as a relic on the 2nd floor in the Hall of Heroes.
I heard an English “sorry” and French “pardon” muttered repeatedly as people bumped into each other and flattened themselves against the stone wall to keep the traffic moving in the narrow staircase. The excitement was growing as the top floor drew nearer.
The walls were getting thinner and brighter. The wind was blowing stronger as I inched closer to the viewing gallery. 246 stairs later I emerged from the staircase to contemplate a jaw-dropping 360 degree view over the Forth Valley.
As strong gusts of wind were blowing through the gallery, I held tight to my camera as if trapped under a giant hair dryer. Still, it felt like the top of the world, minus the bushy hairstyle.
I had travelled to Stirling to get the real picture of the Battle of Stirling Bridge. As I surveyed the extraordinary landscape in front of me from the top of the National Wallace Monument, I realised more clearly than ever before what William Wallace had achieved on that epic day of September 11th, 1297. The real battle had been more epic than the fiction.
The Battle of Stirling Bridge Trail,
a map of key locations to understand the Battle of Stirling Bridge
How To Get To Stirling
Stirling is easily accessible by train from Glasgow with frequent departures from Queen Street Station. The journey is only 30 minutes. If you’re travelling from Edinburgh, you’ll spend around an hour on the train with equally frequent departures from Waverley station.
A word of advice: Hotel rooms and B&Bs are in short supply in Stirling. Book early if you’re planning to stay overnight. I stayed at Munro Guest House; read all about it here.
RELATED POSTS
Leave a Reply